Adding categories in OpenCart
 Lisa, 26th October 2012
Lisa, 26th October 2012
As your business evolves and changes you may find you need to add / edit / delete categories in your shop.
Step 1:
Log into the admin of your shop, and from the menu bar along the top of the screen, select Catalog > Categories.
You'll see the following screen (provided you have some categories in the system already - otherwise you'll see the same screen but the list will be empty).
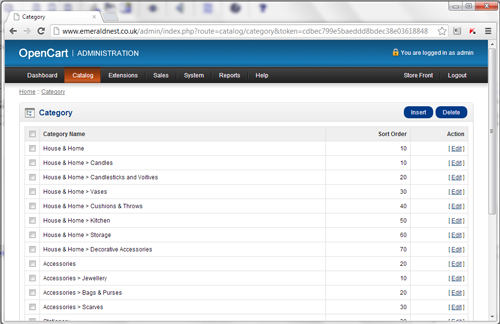
If you wish to edit an existing category, simply click on [Edit] on the right next to that category. If you wish to delete a category, tick the box to the left of it and then click the blue "Delete" button on the top right. But be really sure that you want to delete a category and any associations between it and categories in your catalogue before you do! And make sure no other boxes are ticked by accident otherwise you may delete more than what you meant to!
If you wish to add a new category, click on the blue "Insert" button to the top right of the table.
Step 2:
Once you've clicked "Insert" you'll see the following screen. If you clicked [Edit] you'll see the same screen but with information already filled in.
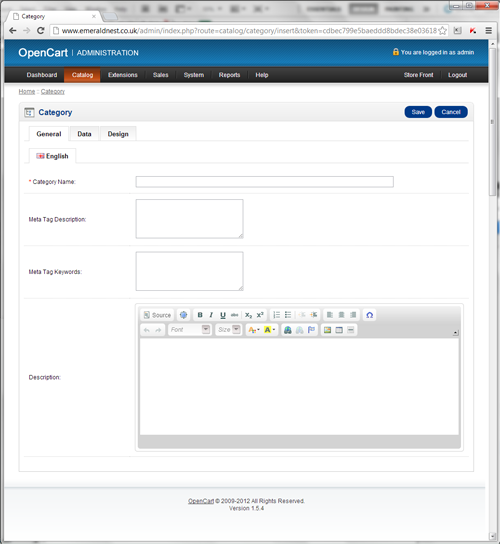
Your screen will be slightly different (longer) if you've got lots of languages enabled but in this example the website is only in English.
Each field on the form:
Category Name: Here you need to write the name of your category.
Meta Tag Description: Here, add a sentence or two about what that category will have in it. This is the page's description for search engines and can sometimes be displayed in search results.
Meta Tag Keywords: Again, for search engines, but not really commonly used anymore. Still worth adding in though. So just write a list of words about that category - 10 words comma seperated with no spaces between them will be fine.
Description: Here you can write an intro about that category which, depending on your theme (design of your shop), could appear on category pages. Use this description box to mention some key words and phrases for search engines but also to entice your customers! You can add images and colours etc. but to keep your site looking professional you should be careful how far you stray from the overall design.
Once you've filled in this page, you can click the blue "Save" button at the top right, or you can click on the "Data" tab. It's a good idea to "Save" often incase your session times out whilst you answer the phone or make a cup of tea! But it will mean you are taken back to the list of categories and will need to click [Edit] to come back to carry on.
Step 3:
The next tab of information is the data tab.

Each field on the form:
Parent Category: If you are adding a sub-category - eg. you've already got a category of "Footwear" and now you're adding "Socks" then you need to select "Footwear" from this drop down list. If you were adding "Footwear" - and so adding a Parent Category - you wouldn't need to select anything from this box. All Parent Categories you add are automatically added to this drop down list for future use.
Stores: This is to do with when you are running more than 1 shop at a time form the same installation of OpenCart. Most often, you don't need to worry about this box and just leave "Default" ticked. If you have more than 1 shop, tick all the shops this category is for.
SEO Keyword: In here, if your site is set up to have search engine friendly URLs, add in a word which will be in the URL for the page. Eg. if you're adding the category "socks" then add "socks" in this box and the URL for that category page will be: http://www.yourshop.co.uk/socks . No two pages online can have the same URL though, so once you've used the SEO keyword of socks for a category, you can't use it for another category or for an information page or anything else. Also, if you have more than 1 word in this box, try to be consistent with how you write them - never leave spaces so either always put a hyphen between words - eg. socks-and-shoes - or perhaps an underscore - socks_and_shoes. The consistency is just so that your site URLs stay looking neat and you don't have some pages of http://www.yourshop.co.uk/socks-and-shoes and some of http://www.yourshop.co.uk/skirts_and_dresses.
Image: Depending on your theme, if you'd like an image to appear on your category page, you can upload it here.
Top: If you've added a Parent Category and you'd like it to appear in the main menu along the top of every page, tick this box. (You'll probably usually want to tick this.)
Columns: This can dictate how many columns your drop-down categories menus from the top main menu are divided into. I usually leave this on 1 but you might want to add more if you've got lots of sub-categories.
Sort Order: This is just a number dictates the order in which the categories appear on the site. 0 means first (or on the left in a horizontal menu) and the highest number would be last (or furthest right). A tip here is to number your sort order in 10s - eg. 10, 20, 30, 40. This means that if you change your mind and want a category inbetween 2 and 3, you can just number it 25 rather than have to edit all the categories and shuffle them all back up 1!
Status: This simply means whether this category is "turned on" or not. It might be that you have a seasonal category, such as "Christmas" which you don't always want on the site but don't want to have to add every year.
Once you've finished this form, either click the blue "Save" button from the top right, or click to the "Design" tab.
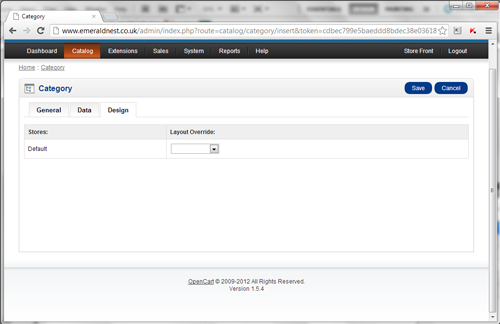
Step 4:
The design tab is very short, and typically I'd say don't touch it! Only update this if you know you need to for your particular theme.
Step 5:
Click the blue "Save" button at the top right of the screen and you're done!
29.02.24
We are delighted to announce that 18a has been recognised for its outstanding work in the "Web Design Agency of the Year - UK" category at… Read →
27.02.24
I recently had an interesting problem to solve. I'd built a brand new author website on a shiny installation of Laravel 10, utilising its out-of-the-box… Read →
15.02.24
WordPress is the incredibly popular blogging-come-full-website platform that powers over 835 million websites* in 2024. It's functionality is extended by plugins, and one such very… Read →


